Category: Diablo 4

  • Diablo 4 Season 13: Best Obducite Farming Guide

    Diablo 4 Season 13: Best Obducite Farming Guide

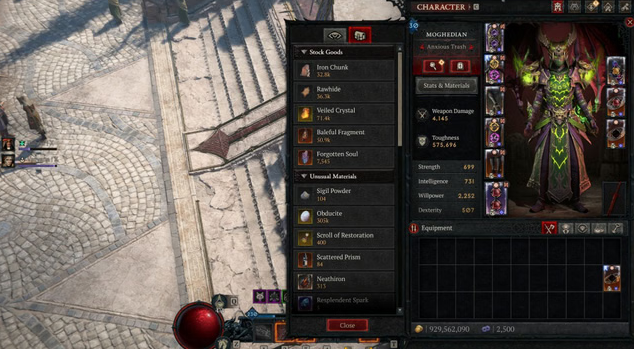
    Obducite stands as one of the most vital endgame crafting materials in Diablo 4 Season 13. Players rely on this rare resource for gear tempering, masterworking upgrades, and high-tier Diablo 4 Items rerolling. Many players struggle with slow, inconsistent Obducite gains while progressing through the endgame. This guide covers the most efficient, tested farming methods to maximize Obducite output, with reliable routes for both solo and group play.

    Why Obducite Matters in Season 13

    Season 13’s updated crafting system heavily increases Obducite consumption. Every endgame build refinement, from rolling powerful greater affixes to upgrading ancestral gear, requires steady Obducite supplies. Without efficient farming strategies, players will face constant material shortages that block gear progression and build optimization.

    Unlike common crafting materials, Obducite does not drop randomly from regular mobs. It only spawns from specific dungeon affixes, endgame events, and targeted farm loops. Focusing on dedicated farming routes is the only way to accumulate massive stockpiles quickly.

    Top 1: Horadric Strongroom Nightmare Dungeon Runs

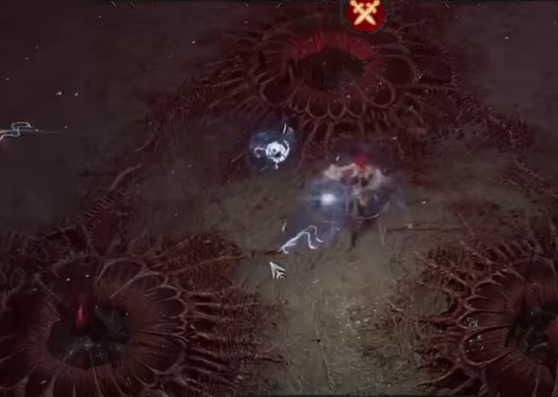
    Horadric Strongroom Nightmare Dungeons are the undisputed best source of Obducite in Season 13. This special dungeon affix guarantees massive material drops, far outperforming standard dungeon runs. A single Strongroom dungeon run yields 1,200 to 3,000+ Obducite, making it the most consistent high-reward option.

    Players can obtain Horadric Strongroom sigils from Occultist crafting or Escalation dungeon boss drops. Prioritize Torment 4 difficulty runs for maximum drop bonuses. Clearing the final boss of Escalation chains often grants additional Strongroom sigils, creating a self-sustaining farming loop.

    Top 2: Treasure Rift Goblin Farming

    Dungeons with the Treasure Rift affix feature swarms of treasure goblins, each dropping 700 to 1,400 Obducite per kill. This method delivers exceptional hourly gains, with dedicated players earning 1,500+ Obducite per hour even in casual runs.

    If a dungeon lacks the Treasure Rift modifier, abandon the sigil immediately to save time. Reset the dungeon repeatedly until the desired affix appears. This skip-and-reset tactic eliminates wasted runs and maintains peak farming efficiency.

    Top 3: Fields of Desecration Open-World Farm

    The Fields of Desecration boasts the highest natural Obducite spawn rate among all open-world zones. This area works perfectly for players who prefer open-world grinding over repetitive dungeon runs. Elite packs and chests here regularly drop sizable Obducite stacks.

    Group farming amplifies this method significantly. A full four-player party increases monster spawn density and loot drop chances, drastically boosting hourly Obducite income. This route is ideal for casual farming while completing seasonal objectives.

    Pro Tips to Boost Obducite Yields

    Always equip drop-boosting elixirs and gear with bonus material drop affixes. These small buffs stack exponentially over dozens of runs, adding thousands of extra Obducite per play session. Use fast AoE-focused builds to clear mobs and dungeons faster for more runs per hour.

    For maximum efficiency, mix Strongroom dungeon runs with Treasure Rift farming. This balanced loop avoids burnout and sustains consistent 20,000 to 30,000 Obducite per hour for advanced players.

    Final Summary

    Horadric Strongroom Nightmare Dungeons remain the core Obducite farm for serious endgame players. Treasure Rift goblin runs offer fast, flexible supplementary gains, while Fields of Desecration works well for relaxed group grinding. By following these optimized strategies, players can fully eliminate cheap D4 materials shortages and maximize their Season 13 gear progression potential.

  • Diablo 4 El’Druin, Sword of Justice: Effect, How to Get, and Best Build Usage

    Diablo 4 El’Druin, Sword of Justice: Effect, How to Get, and Best Build Usage

    El’Druin, Sword of Justice, is one of the most talked-about Unique weapons in Diablo 4 Season 13. Designed as a high-impact cooldown manipulation sword, it has quickly become a standout item for players looking to optimize fast-paced endgame builds. With its powerful elite-kill synergy and universal class compatibility, El’Druin has carved out a niche as both a farming and speed-running powerhouse.

    As Diablo 4 continues expanding its endgame systems, farming high-value Diablo 4 Items and optimizing gear has become more important than ever. Many players are also choosing to buy D4 materials to accelerate crafting and focus more on build experimentation and boss progression rather than repetitive farming loops.

    What Is El’Druin, Sword of Justice?

    El’Druin, Sword of Justice is a Unique one-handed sword available in Diablo 4 that can be used by all classes. Its design focuses on cooldown reduction through elite kills, making it especially powerful in high-density content like dungeons and Helltides.

    Unique Effect

    The core effect of El’Druin is:

    ·Defeating an Elite pack reduces your Skill Cooldowns significantly for a short duration

    This mechanic enables rapid skill cycling, allowing builds to reuse powerful abilities much more frequently than normal.

    In practice, this means:

    ·More frequent ultimate usage

    ·Faster mobility skill resets

    ·Higher burst damage uptime

    ·Smoother farming rotations

    This makes El’Druin one of the strongest tempo-based weapons for speed farming and elite hunting.

    How to Get El’Druin in Diablo 4

    El’Druin, Sword of Justice is a targeted Unique drop, meaning it can be farmed from specific endgame sources rather than random world drops alone.

    Best Farming Sources

    Players can obtain El’Druin from:

    ·Lair Bosses (Duriel, Andariel, Varshan, etc.)

    ·Uber Boss encounters

    ·Nightmare Dungeon rewards

    ·Helltide chests

    ·Elite enemy drops in high Torment tiers

    Because it is part of the general Unique loot pool, repeated boss farming is currently the most efficient method.

    Many players focus on boss rotations because they also drop:

    ·Greater Affix gear

    ·Legendary crafting materials

    ·Rare Diablo 4 Items

    This makes boss farming one of the most efficient endgame loops overall.

    Why El’Druin Is Strong in Season 13

    El’Druin’s value comes from its synergy with modern Diablo 4 endgame pacing. Season 13 heavily rewards:

    ·Fast clears

    ·Elite chaining

    ·Cooldown uptime

    ·High mobility builds

    El’Druin fits perfectly into this structure by turning elite kills into near-permanent cooldown resets.

    Key Advantages

    ·Extremely fast skill cycling

    ·Strong synergy with AoE farming builds

    ·Works on all classes

    ·Scales well into high Torment content

    ·Improves farming efficiency dramatically

    For players focused on grinding Diablo 4 Items, this weapon significantly improves time-to-loot efficiency.

    Best Builds for El’Druin

    While El’Druin is universal, it performs best in builds that rely on cooldown-based burst rotations.

    1. Chain Lightning Sorcerer

    One of the strongest synergies comes from Sorcerer builds that rely on frequent skill casting.

    Benefits:

    ·Constant Lightning uptime

    ·Rapid defensive cooldown resets

    ·High AoE farming speed

    El’Druin allows near-permanent uptime of key defensive skills, making the build safer and faster.

    2. Whirlwind Barbarian

    Barbarian builds benefit heavily from cooldown resets on mobility and damage skills.

    Benefits:

    ·Faster Wrath generation cycles

    ·More frequent War Cry usage

    ·Continuous AoE spin uptime

    This makes it excellent for Helltide farming and Pit progression.

    3. Rapid Fire Rogue

    Rogues gain strong synergy due to elite-focused burst gameplay.

    Benefits:

    ·Faster Shadow Step resets

    ·Increased burst rotation frequency

    ·Strong single-target scaling

    This build excels in boss farming and elite hunting.

    4. Paladin / Crusader Builds (If Available)

    Paladin-style builds benefit heavily from cooldown-based defensive and holy abilities.

    Benefits:

    ·Near-constant shield uptime

    ·Consecration spam

    ·Strong survivability scaling

    How El’Druin Fits Into the Meta Economy

    El’Druin is not just a combat weapon-it also impacts the Diablo 4 economy.

    Because it improves farming speed, it indirectly increases:

    ·Gold generation

    ·Legendary drop rates

    ·Crafting material acquisition

    ·Boss farming efficiency

    This makes it especially valuable for players trying to optimize their Diablo 4 Items progression.

    Why Materials Matter for Optimization

    Once players obtain El’Druin, the real challenge becomes optimizing gear around it.

    Endgame crafting requires:

    ·Gold

    ·Forgotten Souls

    ·Tempering materials

    ·Masterworking resources

    Because these costs scale quickly, many players choose to buy D4 materials to save time and focus on build tuning rather than repetitive farming loops.

    Best Farming Strategy for El’Druin

    To efficiently farm El’Druin, players should:

    1. Rotate Lair Bosses (Duriel, Andariel, Varshan)

    2. Run Nightmare Dungeons for bonus drops

    3. Farm Helltides for elite density

    4. Use Whispers for supplemental loot caches

    Combining these ensures consistent Unique farming while also collecting materials for crafting and upgrades.

    Final Thoughts

    El’Druin, Sword of Justice, is one of the most impactful Universal Uniques in Diablo 4 Season 13. Its elite-kill cooldown mechanic makes it a top-tier choice for farming builds, speed clears, and endgame optimization.

  • Diablo 4 Set Items (Charms & Bonuses) & Talisman System Guide

    Diablo 4 Set Items (Charms & Bonuses) & Talisman System Guide

    Diablo 4’s Lord of Hatred expansion has revolutionized endgame progression with the introduction of set items, reimagined through a brand-new Talisman System that blends the best of Diablo 2’s charm mechanics and Diablo 3’s set bonuses. Unlike traditional set gear that competes for armor or weapon slots, Diablo 4’s set items exist as socketable charms, offering a new layer of character customization without locking players into rigid builds. This guide breaks down everything you need to know about set Diablo 4 Items (charms and their bonuses) and the Talisman System, from unlocking the system to optimizing your charm loadouts for endgame success.

    What Are Set Items in Diablo 4? A Modern Reimagining

    Gone are the days of green set armor pieces that force you to sacrifice unique or legendary gear. In Diablo 4, set items take the form of charms-small, socketable items that grant individual affixes and powerful set bonuses when equipped in the Talisman interface.

    These set charms are distinct from standard charms, which offer basic stat boosts like resistance increases or skill rank bonuses. Set charms belong to specific charm sets, and equipping multiple charms from the same set unlocks tiered bonuses that alter gameplay mechanics, not just raw damage numbers.

    Blizzard’s design avoids Diablo 3’s biggest pitfall: massive, mandatory damage multipliers that made non-set builds unviable. Instead, Diablo 4’s set bonuses focus on playstyle changes, allowing for creativity and hybrid builds that complement your core gear choices.

    Set charms come in multiple rarities, including magic, rare, legendary, unique, and the new set rarity. Each charm has two affix rolls, which can include skill rank increases, experience boosts, resistance enhancements, or crafting material drop rates-adding even more depth to customization.

    The Talisman System: Foundation of Set Item Progression

    The Talisman System is the backbone of set item progression in Diablo 4, unlocked during the Lord of Hatred campaign. If you’ve completed the campaign once, you can skip it in new seasons and unlock the Talisman immediately for your character.

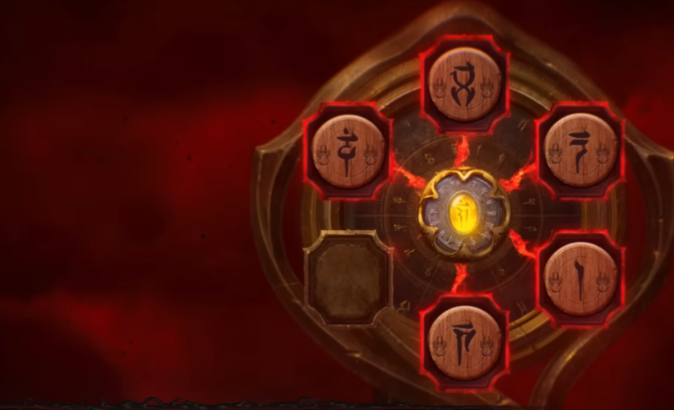
    Accessed through a dedicated tab in your inventory, the Talisman features seven sockets: one central Horadric Seal and six outer charm slots. This separate interface means your set charms never compete with your main gear, letting you keep your favorite unique or legendary items while still benefiting from set bonuses.

    Charms only activate their effects when socketed into the Talisman-they serve no purpose if left in your inventory. This design eliminates inventory clutter and makes charm management a strategic choice, not a storage puzzle.

    The system’s flexibility is its greatest strength. You can mix and match set charms from different sets, combine them with legendary or unique charms, or focus on a single set for maximum synergy. This freedom encourages build experimentation and lets you tailor your Talisman to your playstyle.

    Horadric Seals: The Heart of the Talisman

    At the center of every Talisman is the Horadric Seal-a foundational item that dictates your charm setup’s potential. The only seal revealed so far, the Horadric Seal of Honor, offers a glimpse of how these items shape your progression.

    Seals determine three key things: the number of charm sockets unlocked, fixed stat bonuses, and set affinities that enhance specific charm families. For example, the Horadric Seal of Honor unlocks five of the six possible charm sockets and grants a nearly 50% total armor bonus, along with the ability to equip two unique charms simultaneously.

    Different seals will offer varied trade-offs. Some may unlock all six charm sockets but provide weaker stat bonuses, while others offer powerful set synergies but limit your socket count. This creates meaningful choices for your build-do you prioritize quantity or quality of charm bonuses?

    Seals also have at least one affix roll, which can include cooldown reduction, movement speed, resistances, or other defensive or utility bonuses. These affixes further customize your Talisman and complement your charm loadout.

    Set Charms & Bonuses: How They Work

    Set charms are the key to unlocking tiered set bonuses, which activate as you equip more charms from the same set. Most sets offer 2-piece, 3-piece, and higher-tier bonuses, each providing increasingly impactful gameplay changes rather than just stat boosts.

    A prime example is the Nilfur’s Narrow Eye set, designed for Marksman builds. Its 2-piece bonus grants stacks of “Vengeance” when casting basic Marksman skills-each stack provides 6% increased movement speed and 12% multiplicative damage for Marksman skills, stacking up to five times.

    The 3-piece bonus for Nilfur’s Narrow Eye adds even more utility: while you have Vengeance, you gain one Dark Shroud shadow every two seconds, plus 25% damage reduction when you have at least one shadow. Losing a shadow also knocks back nearby enemies, adding a defensive layer to your build.

    Other sets focus on different playstyles, such as summoning all companions at once (4-piece bonus) or having companions copy your core skills (6-piece bonus). These bonuses transform how your class plays, making set charms a build-defining addition to your Talisman.

    Each set charm also has individual affixes, so even before unlocking set bonuses, they provide value. You might find a set charm that boosts skill ranks or cheap Diablo 4 materials drop rates, making them useful even in partial sets.

    How to Farm Set Charms & Optimize Your Talisman

    Set charms begin dropping in the world once you unlock the Talisman, but they are most commonly found during specific endgame activities. High-difficulty content like Torment IV+ Greater Lair Bosses, Helltide 250-cinder chests, and Slaughterhouse gambling are reliable sources of set charms.

    The Horadric Cube, returning in the Lord of Hatred expansion, also offers a way to craft or transmute set charms. While specific recipes are still being revealed, the Cube allows you to combine consumables or other items to target specific set charms, reducing the grind for your ideal loadout.

    When optimizing your Talisman, prioritize set bonuses that complement your core build. For example, a Druid focusing on companion skills would benefit from a set that enhances companion synergy, while a Sorceress using elemental skills might choose a set that boosts resistance and elemental damage.

    Don’t be afraid to mix and match sets. The Talisman System allows 2/2/2 combinations-equipping two charms from three different sets-to unlock multiple 2-piece bonuses. This hybrid approach lets you tailor your Talisman to fill gaps in your build, such as adding defense to an offensive-focused character.

    Focus on charm affixes that align with your goals. If you’re leveling, prioritize experience-boosting affixes. For endgame combat, look for resistance boosts, skill rank increases, or damage multipliers that complement your core skills.

    Key Differences from Previous Diablo Games

    Diablo 4’s Talisman and Set Charm system differs significantly from its predecessors, addressing longstanding community complaints and improving build diversity.

    Unlike Diablo 3, set items do not compete with your main gear. You no longer have to sacrifice a powerful unique weapon or armor piece to unlock a set bonus-set charms exist in a separate interface, preserving your core gear choices.

    Unlike Diablo 2, charms are not inventory-clogging items. The Talisman’s dedicated socket system keeps your inventory free for loot and consumables, while still offering the customization depth that made Diablo 2’s charm system beloved.

    Most importantly, set bonuses focus on mechanics, not massive damage multipliers. This avoids the “one best build” meta that plagued Diablo 3, keeping non-set builds viable and encouraging creativity.

    Common Mistakes to Avoid

    Even experienced players can make missteps when using the Talisman System. Here are the most common pitfalls to watch out for:

    Don’t ignore the Horadric Seal. Choosing the right seal is just as important as your charm loadout-seals with set affinities can drastically enhance your chosen set’s bonuses, so prioritize seals that align with your build.

    Don’t hoard set charms. Focus on charms that complement your build, not every set you find. Cluttering your Talisman with irrelevant set charms will waste sockets and reduce your overall power.

    Don’t lock yourself into one set. The system’s flexibility is its greatest strength-mixing 2-piece bonuses from multiple sets can create hybrid builds that are more powerful than a full single set.

    Don’t forget to socket your charms. Charms in your inventory do nothing-always socket them into the Talisman to activate their affixes and set bonuses. Double-check your Talisman tab regularly to ensure you’re using your best charms.

    Final Thoughts

    The Talisman System and Set Charms have redefined endgame progression in Diablo 4, offering a perfect blend of customization, flexibility, and build diversity. By separating set items from main gear and focusing on gameplay-altering bonuses, Blizzard has avoided the mistakes of previous titles while delivering a system that rewards strategy and creativity.

    Whether you’re chasing the Nilfur’s Narrow Eye set for your Marksman build, optimizing your Horadric Seal for maximum socket utility, or mixing sets to create a unique hybrid loadout, the Talisman System puts build control firmly in your hands.

    With patience and strategic farming, you’ll unlock the set charms and seal that best complement your playstyle. The Talisman isn’t just a new progression system-it’s a way to make your character truly unique, turning your core build into a powerful, personalized force in Sanctuary’s darkest corners.
  • Diablo 4 Season 12: The Best Solo Activities for Farming Gear and Progress

    Diablo 4 Season 12: The Best Solo Activities for Farming Gear and Progress

    Solo play has always been an important part of the action-RPG experience, and Diablo 4 Season 12 continues to support players who prefer exploring Sanctuary on their own. While many endgame systems encourage cooperative gameplay, solo adventurers can still progress efficiently, collect powerful rewards, and challenge themselves through a variety of activities.

    With seasonal updates expanding the game’s systems, there are now more opportunities than ever for solo players to farm Diablo 4 Gold, obtain powerful Diablo 4 Items, and refine their builds without relying on a party. Whether you enjoy intense dungeon runs, large-scale events, or strategic endgame challenges, the game offers multiple ways to grow stronger while playing alone.

    Nightmare Dungeons: The Heart of Solo Progression

    For many players, Nightmare Dungeons remain the backbone of solo endgame progression. These upgraded dungeons use Nightmare Sigils to increase difficulty while introducing special modifiers that alter combat conditions.

    Running Nightmare Dungeons alone can be extremely rewarding because they provide consistent progression in several areas:

    High experience gains for leveling

    Reliable drops of legendary and unique Diablo 4 Items

    Opportunities to level up Paragon Glyphs

    As players push higher dungeon tiers, enemies become more dangerous, forcing them to refine their builds and strategies. This scaling system creates a natural progression loop where each successful run improves your character and prepares you for even tougher challenges.

    Because of the steady rewards and difficulty scaling, many solo players spend a large portion of their time farming Nightmare Dungeons to improve their gear and gather valuable Diablo 4 Gold.

    Helltides: Fast-Paced Farming for Loot and Resources

    Helltide events are another excellent option for players who enjoy fast-paced combat and frequent rewards. During these events, entire regions of the map become overrun by demonic forces, dramatically increasing enemy density and danger.

    For solo players, Helltides offer a great opportunity to gather:

    crafting materials

    legendary equipment

    upgrade resources

    large amounts of Diablo 4 Gold

    Defeating enemies grants special currency that can be used to open Tortured Gifts scattered across the zone. These chests contain valuable loot and often provide powerful Diablo 4 Items that can significantly improve your build.

    Since enemies spawn rapidly throughout Helltide zones, this activity also provides excellent experience gains. Players who enjoy constant action often use Helltides as one of the fastest solo farming methods in the game.

    Tree of Whispers: Efficient Rewards for Casual Sessions

    Not every player has time for long grinding sessions, and the Tree of Whispers system offers a great alternative for shorter play periods.

    This bounty-style system provides objectives such as:

    clearing dungeons

    defeating elite enemies

    completing world events

    finishing specific map activities

    Completing these tasks earns Grim Favors. Once enough favors are collected, they can be turned in for reward caches that contain gear, crafting materials, and sometimes valuable Diablo 4 Items.

    For solo players, this system is particularly convenient. You can choose which objectives to complete and progress at your own pace, making it a flexible way to earn rewards and accumulate Diablo 4 Gold without committing to lengthy endgame runs.

    Strongholds: Immersive Solo Challenges

    Strongholds are some of the most memorable encounters in Diablo 4. These corrupted locations are filled with dangerous enemies and powerful bosses that must be defeated to reclaim the area.

    Clearing a Stronghold provides several benefits:

    permanent changes to the surrounding region

    access to new dungeons or waypoints

    valuable gear and resource rewards

    Strongholds feel almost like mini story missions, offering unique mechanics and environmental storytelling that enhance the overall experience. Many players consider them one of the most enjoyable solo activities in the game.

    In addition to their narrative appeal, Strongholds can also reward useful Diablo 4 Items and provide a satisfying sense of accomplishment once completed.

    The Pit: A True Test of Build Strength

    For players who want to push their characters to the limit, The Pit offers a challenging endgame activity designed to test build efficiency and skill.

    The objective is straightforward: clear enemies quickly and defeat the final boss before time runs out. As you progress through higher tiers, enemy strength increases dramatically, forcing players to optimize their builds and strategies.

    Solo players often run The Pit to:

    test new character builds

    measure damage output and survivability

    farm high-end materials

    Successfully completing higher tiers can reward powerful Diablo 4 Items and additional resources, making it a valuable activity for players focused on maximizing their character’s power.

    Fields of Hatred: Risk and Reward for Solo PvP

    Although Diablo 4 includes PvP zones, they can still be enjoyable for solo players. The Fields of Hatred allow players to collect Seeds of Hatred by defeating enemies throughout the area.

    These seeds can then be converted into currency used to obtain rewards. However, other players can attack you at any time, adding a layer of tension and excitement.

    Some solo players enjoy using stealthy strategies in these zones. By farming enemies quickly and carefully avoiding other players, you can collect valuable rewards and gather extra Diablo 4 Gold before escaping.

    The risk-versus-reward dynamic makes these areas unpredictable and exciting compared to standard PvE content.

    Why Solo Play Thrives in Diablo 4

    Even though Diablo 4 supports cooperative gameplay, it remains highly accessible for solo adventurers. With the right build and strategy, players can complete nearly every type of content without relying on teammates.

    Solo players can still:

    push high-tier Nightmare Dungeons

    complete seasonal objectives

    farm powerful Diablo 4 Items

    collect large amounts of Diablo 4 Gold

    Many players actually prefer the solo experience because it allows them to experiment with builds, explore Sanctuary freely, and progress at their own pace.

    As new seasonal updates continue to expand the game, Diablo 4 remains an excellent choice for players who enjoy challenging content without the need for constant group play.

    From Nightmare Dungeons and Helltides to Strongholds and The Pit, Season 12 offers plenty of ways for solo players to grow stronger while exploring the dark and dangerous world of Sanctuary.

  • Diablo 4 Season 12 Guide: Best Builds for Every Class

    Season 12 of Diablo 4 is here, and if you want to hit the ground running, choosing the right build is crucial. Whether you’re looking to optimize your gameplay or buy Diablo 4 Gold to get a head start, here’s a breakdown of the top builds for each class, optimized for both speed and efficiency, along with estimated Pit tiers and playstyle tips.

    1. Paladin: Orian & Thorns Builds

    Top Recommendation: Orian Build

    · Pit Tier Estimate: 120+

    · Playstyle: Walking simulator, extremely fast at clearing content, smooth for kill streaks.

    · Weapon: Two-handed axe (updated from one-handed + shield).

    Why Play It:

    Orian dominates in all forms of content this season due to its efficiency in holding kill streaks, walking through objectives, and obliterating enemies without complicated combos. If you want the fastest, most chill Paladin experience, this is it.

    Alternative: Shieldthrowing Thorns Build

    · Pit Tier Estimate: 120+

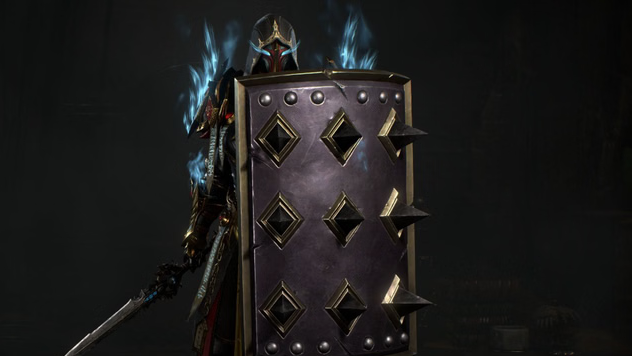
    · Playstyle: Button-light, casual-friendly, damage comes from throwing your shield rather than taking hits.

    Why Play It:

    · Great for players who want high damage without constantly spamming abilities. A chill, effective build for solo or group play.

    Other Notes:

    · Judgment Paladin is still playable but feels clunky due to slower application.

    · Wing Strikes are solid but not as popular this season.

    2. Druid: Pulverized Build

    · Pit Tier Estimate: 124

    · Playstyle: Hit-once, high-damage, minimal button-pushing.

    · Skills: Pulverize is the core, but you can shapeshift into Werewolf for bonuses in higher-tier content.

    Tips: Overlap poison puddles for optimal damage in high-tier fights. Very similar gameplay to previous seasons.

    3. Barbarian: Hoda (Hammer of Ancients)

    · Pit Tier Estimate: 129

    · Playstyle: Slam-heavy, satisfying one-hit clears, moderate button-pushing.

    Tips:

    · Group enemies for maximum effect.

    · Wrath of Berserker + triple shouts are useful for low-tier speed content.

    · Hoda is one of the top-tier classes for Pit pushes, open world, and general farming.

    · Alternative: Lunging Strike is viable but situational.

    4. Necromancer: Golem Build

    · Pit Tier Estimate: 115–116

    · Playstyle: Tanky, autonomous damage via summoned Golems, keeps kill streaks going.

    Why Golem:

    Compared to Shadow Blight, the Golem build slightly favors sustained kill streaks due to passive damage and higher survivability. Ideal for XP farming and Tormented 4 content.

    5. Rogue: Heartseeker & Dance of Knives

    1.Top Pit Tier: 125 (Heartseeker with Orphan Maker)

    2. Playstyle: Fast, high single-target damage, skill-intensive.

    3. Alternative: Dance of Knives

    4. Great for speed farming in open world content.

    · Lower Pit tier compared to Heartseeker.

    · Casual-friendly for T4 content and kill streak XP.

    Note: Heartseeker may feel clunky for casual players but excels in Pit push ranking.

    6. Sorcerer: Crackling Energy

    · Pit Tier Estimate: 119

    · Playstyle: Fast, energy-based spam, highly mobile.

    · Optional Variant: Ice Shards + Halo Verglass for maxed-out damage (for leaderboard players).

    Tips: Focus on kill streak maintenance, especially in Infernal Horde and Hell Tide content. Avoid overcomplicating with niche builds unless ranking top-tier is your goal.

    7. Spirit Born: Payback

    · Pit Tier Estimate: 126

    · Playstyle: Active, ultimate-heavy, jump-in playstyle.

    · Strengths: Fast, top-tier Pit pusher, strong even without Mythic items.

    Tips: Always maintain buffs and ultimates; highly engaging for players who enjoy active gameplay.

    Season 12 Overview

    · Top Classes (Pit Tier Focus):

    1. Barbarian (Hoda) – 129

    2. Spirit Born – 126

    3. Rogue (Heartseeker) – 125

    4. Druid (Pulverized) – 124

    5. Paladin (Orian/Thorns) – 120+

    6. Sorcerer (Crackling Energy) – 119

    7. Necromancer (Golem) – 115

    · Key Notes:

    1. All builds can clear Tormented 4 content comfortably.

    2. Kill streak maintenance is crucial in Season 12.

    3. Bloodied items may impact build rankings; updates may adjust strategies.

    Quick Tips for Season 12

    · Stick with Orian for Paladin if unsure.

    · Use Pulverize Druid and Hoda Barbarian for high Pit-tier progression.

    · Maintain kill streak chains to maximize XP bonuses.

    · Choose casual-friendly builds (Thorns Paladin, Dance of Knives Rogue) for T4 content farming.

    · Adjust for personal playstyle: button-heavy vs chill “walk-through” builds.

    This guide provides a clear roadmap for your Season 12 Diablo 4 journey. Whether you’re grinding Paragon points, clearing Hell Tides, or pushing Pit levels, these builds will ensure you have an optimized, fun, and efficient experience. For players looking to get ahead, you can also buy cheap Diablo 4 Items safely and quickly through MMOEXP, giving you the resources to enhance your characters and dominate the season.

  • Diablo 4 Season 11 Barbarian Guide: How to Level Quickly and Efficiently

    Diablo 4 Season 11 Barbarian Guide: How to Level Quickly and Efficiently

    Barbarians in Diablo 4 Season 11 remain one of the most versatile and fast-paced classes for leveling. Among the various builds, the Whirlwind Barbarian continues to shine as the fastest, most comfortable, and consistent path to level 60. This guide breaks down everything you need: the core mechanics of the build, skill priorities, passives, Mercenary and Rune combos, Divine Gifts, and the best gear choices to transition smoothly into Season 11 endgame content.

    How the Whirlwind Barbarian Leveling Build Works

    The Whirlwind Barbarian relies on a simple yet highly effective loop:

    1. Generate Fury using Lunging Strike

    2. Activate Shouts for Fury, movement speed, and survivability

    3. Pull enemies together with Wrath of the Berserker + Ground Stomp

    4. Spin through mobs with Whirlwind, applying damage over time and Bleed effects

    The build’s power comes primarily from Dust Devils, small whirlwinds spawned by Whirlwind and Shouts. These deal supplemental damage and dramatically increase AoE clear speed. Defensive layers are maintained through key Legendary Aspects, including:

    ·Aspect of Might – Increases Armor and Damage Reduction

    ·Aspect of Disobedience – Boosts Fury generation and mitigates incoming damage

    ·Aspect of Numbing Wrath – Adds defensive utility and sustain

    Consistently using Lunging Strike every few seconds refreshes these defenses, and combined with Rallying Cry, Barbarians remain tanky enough to face most leveling encounters.

    Skill Bar Setup

    For fast and efficient leveling, the recommended active skills are:

    ·Lunging Strike – Primary Fury generator and mobility tool

    ·Whirlwind – Main damage dealer and AoE skill

    ·Wrath of the Berserker – Buffs damage and movement speed

    ·War Cry – Increases Fury and defensive stats

    ·Ground Stomp – Crowd control and positioning

    ·Rallying Cry – Sustain through healing and defensive bonuses

    This combination ensures smooth gameplay by balancing mobility, resource management, crowd control, and consistent damage output.

    Talent and Arsenal Choices for Leveling

    The Barbarian Talent Tree should prioritize:

    1. Unlocking Whirlwind and upgrading it first

    2. Grabbing core Shout passives for Fury generation

    3. Investing in Fury generation and defensive nodes

    4. Adding Bleed multipliers to Whirlwind for sustained damage

    5. Unlocking mobility and Berserking nodes for faster floor clearing

    Arsenal’s setup allows Barbarians to assign weapon types to specific skills. For this build:

    ·Technique Slot: Two-Handed Axe for extra damage to Vulnerable enemies

    ·Whirlwind & Lunging Strike: Two-Handed Slashing Weapon

    This ensures that Furious Whirlwind applies Bleed, drastically boosting AoE damage during leveling.

    Divine Gifts for Barbarian Leveling

    In Season 11, Divine Gifts are essential for maximizing XP and resource efficiency. The best leveling option is Essence of Squalor, obtained from Helltides.

    Why Essence of Squalor excels:

    ·Maggots drop Experience Globes

    ·Effects are doubled when Purified

    ·Grants a free healing potion every 20 seconds

    This Gift turns Helltides into XP farms, letting players reach level 60 quickly. For optimal efficiency, keep a stock of Diablo 4 materials to craft upgrades between Helltides.

    Best Mercenary and Rune Combos

    Mercenaries provide crucial crowd control and support during leveling. Raheir remains the top choice for Whirlwind Barbarians due to his CC abilities and defensive toolkit.

    Raheir Talents:

    ·Ground Slam

    ·Raheir’s Aegis

    ·Bastion

    ·Inspiration

    Secondary Mercenary: Varyana – links Bloodthirst to Whirlwind for extra sustain and burst.

    Recommended Rune Combinations:

    1. Cir + Gar: After three casts of a non-channeled skill, gain Crit Chance

    2. Moni + Tec: Using two Mobility or Macabre skills triggers a mini-Earthquake

    These combinations enhance damage, sustain, and combat engagement before full Whirlwind synergies kick in.

    Uniques and Aspects for Endgame Transition

    While leveling is forgiving with gear, preparing for endgame ensures smooth progression. Barbarians benefit from upgrading or buying Diablo IV Items to jumpstart their Season 11 endgame journey.

    Top Endgame Uniques:

    ·Melted Heart of Selig

    ·Ramaladni’s Magnum Opus

    Key Legendary Aspects for Whirlwind:

    ·Dust Devil’s Aspect – Boosts AoE and sustain

    ·Aspect of Numbing Wrath – Defensive enhancement

    ·Aspect of Disobedience – Fury and damage synergy

    ·Aspect of Might – Armor and DR

    ·Aspect of Limitless Rage – Increases Fury and burst

    ·Aspect of Echoing Fury – Enhances Whirlwind hits

    ·Veteran Brawler’s Aspect – Reduces incoming damage and enhances survivability

    These elements collectively improve survivability, maximize AoE damage, and allow easy transition to greater difficulties.

    Final Thoughts

    The Whirlwind Barbarian is currently the fastest, most reliable way to level from 1-60 in Diablo 4 Season 11. It offers:

    ·High AoE damage for rapid mob clearing

    ·Strong survivability through Aspects and Shouts

    ·Straightforward skill rotation for low-maintenance play

    ·Seamless transition into endgame content

    Even if your ultimate goal is a HOTA build or another endgame specialization, Whirlwind provides the speed, efficiency, and comfort needed to dominate the leveling process in Season 11. For players looking to optimize XP, loot, and skill progression, this build remains the go-to Barbarian path.