Tag: OSRS Gold

  • OSRS:The Ultimate Beginner Guide to Giant Foundry

    OSRS:The Ultimate Beginner Guide to Giant Foundry

    Tired of the repetitive grind at the anvil? Giant’s Foundry lets you gain XP while actively playing, making the rush to level 99 much easier. But are you struggling to get in? Unsure about the right gear? Worried about messing up the process and missing out on rewards? We’ve compiled a complete guide covering everything from requirements to the workflow—read this, and you’ll be ready to start grinding smoothly. Want to stock up on materials quickly for an uninterrupted level-up rush? Head straight to RSorder to OSRS gold and boost your game level!

    Getting In: The Mandatory Prerequisite Quest

    Many players find the location but get turned away at the door; the main reason is often missing the “Sleeping Giant” quest. This is a strict requirement for entry—without it, you simply cannot get inside. The quest itself is short and acts as a free, official tutorial: you’ll talk to NPCs to learn the foundry’s layout and gather starter materials to practice the core mechanics of heating, shaping, and cooling. Completing it permanently unlocks the minigame, giving you hands-on experience so you can start taking contracts and grinding levels immediately.

    Stocking Up: Bring the Right Gear to Double Your Efficiency

    Once the quest is done, you can enter, but preparing the right items beforehand saves you a lot of wasted time and prevents mid-grind trips to restock supplies:

    Core Essentials: Stockpile Metal Bars for Uninterrupted Grinding

    The entire forging process at Giant’s Foundry relies on metal bars; crafting a weapon consumes a specific amount. You can use anything from Bronze and Iron to high-level bars like Mithril. Higher-tier metals unlock better contracts and yield more XP. We recommend stocking up before you start so you can run multiple rounds without leaving to gather more resources, keeping your leveling momentum going strong. Cooling Options: Free Buckets vs. Speed-Boosting Ice Gloves

    Cooling the high-temperature mold is a mandatory step. Beginners who haven’t unlocked special items need not worry; free buckets are available right inside the Foundry, though making a trip to grab one each time is a bit of a hassle. However, if you have completed the “Hero’s Quest,” be sure to equip Ice Gloves. They allow you to handle hot metal directly without constantly fetching water, saving significant travel time and boosting your operational speed—a must-have for efficiency-focused players.

    Optional Optimization: Pre-stocking Materials for Specific Contracts

    If you accept a special contract requiring a specific shape and material, prepare the corresponding metal bars in advance. This saves you the trouble of running back to the bank mid-process.

    Whether you are leveling up or crafting gear, having plenty of gold makes the experience smoother. Get OSRS gold instantly at RSgoldfast and enjoy the game to the fullest!

    The Full Process: Follow Every Step Carefully to Maximize Rewards

    Once you enter with your supplies, follow these steps for every weapon contract. A single mistake can lower the weapon’s quality and reduce your XP gain, so keep this in mind:

    1.Choose the Right Mold: The mold determines the weapon type and required materials. Different molds offer varying XP and consume different amounts of bars; simply choose based on your current level and the materials you have stockpiled.

    2.Control the Temperature: After placing metal bars in the furnace, keep a close eye on the thermometer. Temperatures that are too high or too low will degrade the weapon’s quality. Wait until the temperature is in the optimal range before proceeding—don’t rush and make careless moves.

    3.Pour Precisely: Pour the molten metal into the mold only when the temperature is correct. Greater precision results in higher weapon quality, yielding better rewards and more XP upon completion.

    4.Don’t Forget to Cool: You must cool the item before finalizing its shape. You can use either a bucket or Ice Gloves; this step prevents weapon damage and ensures a successful delivery.

    5.Deliver and Claim Rewards: Hand the finished massive weapon to Kovac to receive Smithing XP and Foundry-exclusive rewards. That completes the entire process. Tips for Efficient Leveling: Master These to Gain XP Faster Than Others

      If you want to reach Level 99 faster, be sure to use these tips compiled by veteran players:

      Keep your inventory streamlined; don’t carry useless clutter that causes you to fumble and waste time when looking for items;

      Experiment with different mold combinations—different levels and materials require different molds. Finding the one that suits you best maximizes your XP gains;

      Always check your metal ingot reserves before starting; running out of materials mid-run disrupts your rhythm. Stocking up beforehand ensures you maintain a steady leveling pace;

      Check out tips from community experts; the OSRS forums and wiki are full of strategies to optimize XP and profits. Using proven methods is far more efficient than trial and error;

      Take a break after an hour or two of grinding—don’t push yourself too hard. Staying fresh helps maintain efficiency and prevents burnout that might make you quit the game entirely.

      Pro Tips

      1.Bring at least 20 metal ingots for your first run; entering without materials means leaving empty-handed—a total waste of a trip;

      2.Don’t rush the “Heroes’ Quest” just to unlock Ice Gloves; using a bucket of water works fine for getting started, and you can switch over once you unlock the gloves later;

      3.For faster XP, prioritize molds that match higher-level metal ingots. If you have the materials, the XP gain is significantly faster than with lower-level ones;

      4.Power-leveling Smithing to 99 requires a massive amount of metal ingots. Instead of slowly mining to gather resources, simply buy coins at RSorder to boost your game level and secure that 99 Smithing cape sooner.

        The Giant’s Foundry transforms the otherwise tedious Smithing grind into an engaging, interactive challenge. By meeting requirements, preparing the right gear, and following the correct process, you can gain XP while having fun—offering a far better experience and higher returns than the traditional anvil method. Follow this guide to kickstart your leveling journey and achieve 99 Smithing. Want to gather materials quickly for the grind? Head over to RSorder to cheap OSRS gold and boost your game level now!
      1. Dragonfire Ward Guide in Old School RuneScape

        Dragonfire Ward Guide in Old School RuneScape

        Old School RuneScape (OSRS) continues to captivate players with its rich lore, challenging boss fights, and an enormous variety of gear. Among the game’s most useful defensive items is the Dragonfire Ward, a powerful shield designed to protect players from some of the most dangerous enemies in Gielinor. Whether you are fighting dragons, tackling difficult PvM encounters, or preparing for late-game content, the Dragonfire Ward offers an excellent blend of defense and utility.

        In this guide, we’ll explore what makes the Dragonfire Ward so valuable, how to obtain it, and why many players consider it a must-have item for dragon-based combat encounters.

        What Is the Dragonfire Ward?

        The Dragonfire Ward is a high-tier shield in Old School RuneScape known for its strong defensive bonuses and unique dragonfire protection. As its name suggests, the ward is specifically designed to help players withstand the devastating dragonfire attacks used by powerful dragons and dragon bosses.

        Unlike many other shields in the game, the Dragonfire Ward combines strong defensive stats with a special ability that reduces the damage from dragonfire attacks. This makes it incredibly useful when fighting enemies such as Vorkath or the King Black Dragon.

        Because dragonfire can deal massive damage to unprepared players, having a reliable shield like the Dragonfire Ward significantly increases your survivability during these encounters.

        Dragonfire Ward Stats and Bonuses

        One of the main reasons the Dragonfire Ward remains popular among OSRS players is its impressive stat profile.

        The shield provides strong defensive bonuses across multiple combat styles, making it a versatile option in both PvE and certain PvP scenarios.

        Key defensive stats include:

        ·+75 Melee Defense

        ·+75 Ranged Defense

        ·+40 Magic Defense

        These bonuses make the ward extremely effective when dealing with high-damage enemies. In addition to these stats, the shield’s dragonfire protection allows players to absorb a portion of incoming dragonfire damage, reducing the risk of sudden knockouts during boss fights.

        For players who frequently hunt dragons or farm dragon-based bosses, the Dragonfire Ward becomes an essential part of their equipment setup.

        How to Obtain the Dragonfire Ward

        Getting the Dragonfire Ward requires players to complete one of the most iconic quests in Old School RuneScape.

        Complete Dragon Slayer II

        The primary way to unlock access to the Dragonfire Ward is by completing the legendary Dragon Slayer II quest. This quest is considered one of the most challenging storylines in the game and takes players on an epic adventure involving dragons, ancient secrets, and powerful enemies.

        The quest culminates in a dramatic boss fight against Vorkath, one of the most famous dragon bosses in OSRS.

        Completing Dragon Slayer II not only unlocks new areas and content but also allows players to obtain powerful dragon-related equipment, including the Dragonfire Ward.

        Quest Requirements

        Before attempting Dragon Slayer II, players must meet several prerequisites. These include completing the original Dragon Slayer quest and several other storyline quests, such as The Restless Ghost.

        Additionally, players should prepare for difficult combat encounters and challenging environments. Recommended stats generally include:

        ·High combat levels (90+ combat recommended)

        ·Strong melee or ranged gear

        ·Adequate supplies such as food and potions

        Completing the quest is no small feat, but the rewards make the effort worthwhile. In addition to unlocking valuable equipment, players often earn a respectable amount of OSRS gold through boss farming opportunities unlocked after the quest.

        The Dragonfire Ward in Combat

        The Dragonfire Ward truly shines in combat situations where dragonfire attacks are present. However, its usefulness extends beyond just dragon encounters.

        1. Dragon Boss Fights

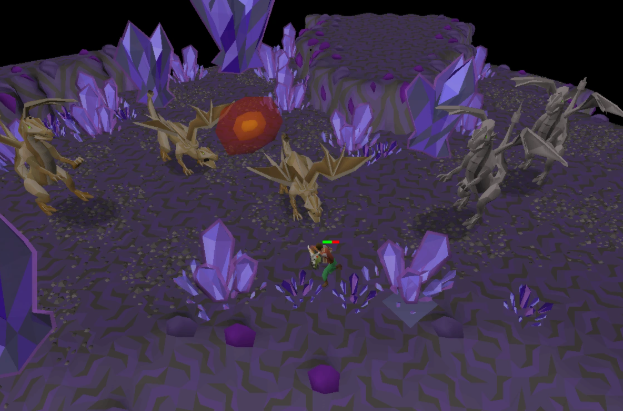
        The shield is most commonly used when fighting dragon bosses such as Vorkath and the King Black Dragon. These bosses rely heavily on dragonfire attacks, which can deal massive damage if players are unprotected.

        Equipping the Dragonfire Ward allows players to mitigate a portion of this damage, making fights far safer and more manageable.

        2. General PvM Activities

        Even outside dragon-specific encounters, the ward’s strong defensive stats make it a solid choice for general PvM. Many players use it while fighting high-level monsters, completing Slayer tasks, or exploring dangerous areas.

        Its balanced defensive bonuses protect melee, ranged, and magic attacks, giving players extra survivability in prolonged fights.

        3. PvP Situations

        While not primarily designed for PvP, the Dragonfire Ward can still be useful in certain Wilderness scenarios. Its defensive bonuses can help players survive longer against opponents who rely on dragonfire-based weapons or strong ranged attacks.

        Managing Gear Costs with OSRS Gold

        High-tier equipment in Old School RuneScape often requires significant financial investment. Maintaining strong gear setups, purchasing supplies, and upgrading equipment all require a steady supply of OSRS gold.

        Many players earn gold through activities like:

        ·Killing Vorkath

        ·Farming Zulrah

        ·High-level Slayer tasks

        ·Raids and bossing

        ·Grand Exchange flipping

        However, these methods can take time. Some players who want to accelerate their progress choose to purchase resources or buy OSRS items through online marketplaces. This approach allows them to quickly obtain essential gear upgrades and spend more time enjoying high-level content rather than grinding for currency.

        Regardless of the method used, having a healthy gold reserve helps players prepare for expensive upgrades like the Dragonfire Ward and other powerful equipment.

        Why the Dragonfire Ward Is Worth It

        The Dragonfire Ward remains one of the most valuable defensive shields in Old School RuneScape for several reasons.

        First, its dragonfire protection makes it extremely useful for dragon hunting and boss farming. Second, its strong defensive bonuses make it viable for many combat situations. Finally, it represents an important milestone in a player’s progression through the game.

        Players who obtain the Dragonfire Ward often find that it significantly improves their survivability and confidence during high-level PvM encounters.

        Final Thoughts

        The Dragonfire Ward stands as one of the most iconic defensive items in Old School RuneScape. With powerful defensive stats and built-in dragonfire protection, it enables players to take on some of the most dangerous enemies in the game.

        Although acquiring the ward requires completing the challenging Dragon Slayer II quest and preparing for intense battles, the reward is well worth the effort. For adventurers exploring the dangerous world of Gielinor, the Dragonfire Ward offers both protection and prestige.

      2. OSRS Osmumten’s Fang Guide: The Ultimate Weapon for High-Defense PvE

        OSRS Osmumten’s Fang Guide: The Ultimate Weapon for High-Defense PvE

        In Old School RuneScape (OSRS), few weapons have reshaped high-level PvE combat as profoundly as Osmumten’s Fang. Introduced alongside the Tombs of Amascut raid, the Fang quickly gained a reputation for accuracy, reliability, and consistent damage against enemies with high defense. Unlike flashy weapons that focus on massive max hits, the Fang excels in sustained, dependable damage, making it an essential tool for endgame melee players.

        This comprehensive guide explores what makes Osmumten’s Fang stand out, its best use cases, and how to optimize your setup for maximum performance.

        What Is Osmumten’s Fang?

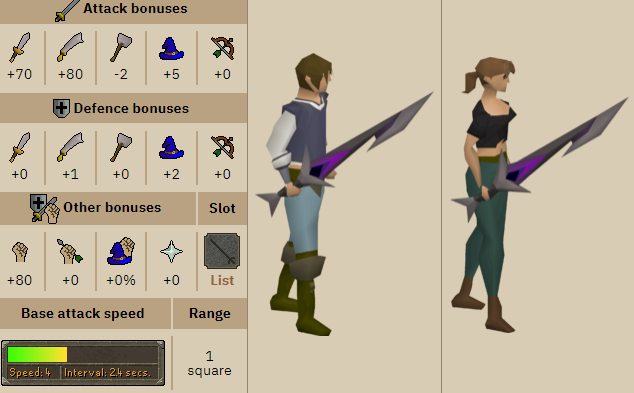
        Osmumten’s Fang is a one-handed stab melee weapon, primarily used with Strength-focused builds. It is specifically designed to shine against high-defense enemies, a niche where many other melee weapons struggle.

        What sets the Fang apart is its unique double-roll accuracy mechanic: instead of calculating a single accuracy roll for each attack, it rolls twice and chooses the better result. This significantly reduces zero-damage hits and smooths out overall damage output, making it far more consistent than other endgame weapons.

        Key characteristics of Osmumten’s Fang:

        ·One-handed melee weapon

        ·Stab attack style

        ·Double-roll accuracy mechanic

        ·Highly reliable DPS against high-defense targets

        Unlike weapons that rely on flashy max hits, the Fang emphasizes steady, predictable damage, which is often more valuable in long boss fights or raid scenarios.

        Why Osmumten’s Fang Excels in PvE

        The Fang’s unique design makes it especially useful in high-level PvE content. Its strengths include:

        1. Exceptional Accuracy

        The double-roll accuracy mechanic ensures the Fang lands hits more consistently than other weapons, even against bosses with extremely high Defense. Where other weapons frequently splash or hit zero, the Fang reliably contributes meaningful damage.

        2. Reliable DPS

        Over-extended fights, consistent hits often outperform weapons with higher theoretical max hits. Players who rely on sustained damage over time benefit significantly from Fang’s dependability.

        3. One-Handed Flexibility

        Being one-handed, the Fang allows the use of defenders or shields, which enhances both survivability and overall damage potential. This versatility is ideal in challenging raids or boss encounters.

        Best Use Cases for Osmumten’s Fang

        Osmumten’s Fang shines in scenarios where accuracy is more critical than raw max hit. Popular applications include:

        ·Tombs of Amascut raids

        ·God Wars Dungeon bosses

        ·High-defense Slayer bosses

        ·Group PvM situations where consistent damage is key

        While it can technically be used in PvP, the Fang is not designed for burst or surprise kills. Its strength lies firmly in PvE reliability, making it the weapon of choice for long fights against durable opponents.

        Gear and Requirements

        To maximize Osmumten’s Fang, players typically focus on:

        ·High Strength levels for increased damage

        ·Melee accuracy bonuses to leverage the Fang’s unique mechanics

        ·Gear that complements stab attack style

        Acquiring and building around the Fang can be expensive. Players often fund their progress through bossing, Slayer tasks, or Grand Exchange flipping. Others may responsibly choose to use OSRS gold, allowing them to focus on gameplay and progression rather than grinding for resources.

        How Osmumten’s Fang Changed Endgame Melee

        Before the Fang, high-defense PvE encounters often pushed players toward niche weapons or magic-based alternatives. Osmumten’s Fang offered a dependable melee option without relying on situational bonuses or gimmicks.

        Its consistency over raw power makes it particularly appealing for:

        ·Long boss fights

        ·High-stakes raid mechanics

        ·Players prioritizing predictable, steady damage output

        Even though it may not replace every weapon in your bank, it fills a critical niche that few other items cover as effectively.

        Conclusion: Why Osmumten’s Fang Is Essential

        Osmumten’s Fang is one of OSRS’s most intelligently designed weapons. Its double-roll accuracy, consistent damage, and one-handed versatility make it a must-have for endgame PvE combat.

        Whether you’re progressing through Tombs of Amascut, optimizing boss kill efficiency, or preparing your bank for long-term upgrades, understanding and utilizing the Fang is essential for success.

        For players looking to accelerate their progression, responsibly choosing to buy OSRS gold from reputable platforms can bridge the gap between time investment and high-end gear acquisition, allowing you to focus on combat mastery instead of grinding endlessly.

        In a game where consistency often defines success, Osmumten’s Fang stands out as one of the most reliable and powerful melee weapons in OSRS.

      3. Flame Cape in OSRS:Everything You Need to Know

        Flame Cape in OSRS:Everything You Need to Know

        The Flame Cape is a highly sought-after melee cape in Old School RuneScape, celebrated for both its fierce visual design and impressive combat bonuses. It’s awarded to players who successfully complete the grueling TzHaar Fight Cave, and stands as a badge of honor in the game—second only to the legendary Infernal Cape.

        How to Get the Flame Cape

        To earn the Flame Cape, players must survive all waves of the TzHaar Fight Cave and defeat the final boss, TzTok-Jad. This fight is widely regarded as one of the game most demanding challenges, requiring a solid grasp of prayer switching, damage management, and positional awareness. Victory over TzTok-Jad not only rewards the player with the Flame Cape but also marks a major milestone in any OSRS career.

        Stat Bonuses and Combat Utility

        The Flame Cape offers several powerful benefits, especially for melee-focused characters:

        Melee Attack & Defence Bonuses: The cape significantly boosts melee accuracy and resistance, making it a reliable choice for both PvM and PvP.

        Strength Bonus: It increases melee damage output, helping maximize DPS in boss fights or Slayer tasks.Join the winning team at RSgoldfast! Our commitment to quality and customer satisfaction makes us your best choice for all your OSRS gold needs!

        Minor Bonuses to Other Skills: While its focus is melee, the cape grants small boosts across other combat areas, adding utility without compromising its main role.

        Unique Features and Uses

        The Flame Cape isn’t just powerful—it’s versatile and symbolic, with features that go beyond combat:

        Storage and Display Options

        Players can store the cape in their player-owned house using the Cloak Rack or showcase it in the Achievement Gallery, preserving space and displaying a hard-earned trophy.

        Symbol of Achievement

        Wearing the Flame Cape tells a story—it’s proof you’ve conquered one of OSRS hardest solo encounters. Among seasoned players, it’s a recognized mark of combat proficiency.

        Trade Value and Pet Unlock

        Players can exchange the Flame Cape for 8,000 Tokkul by speaking to TzHaar-Mej-Jal, or trade it in to unlock the Tzrek-Jad pet—a miniature version of Jad that follows your character around. This choice between currency and companionship adds depth to your reward.

        Combining with the Max Cape

        Maxed players can merge the Flame Cape with their Max Cape, creating the Flame Max Cape. This version retains all the bonuses of the original cape while offering a distinct look that reflects total level mastery and combat prowess.

        Warm Clothing for Wintertodt

        Surprisingly, the Flame Cape has non-combat utility as well. When tackling the Wintertodt boss, it counts as a piece of warm clothing, reducing incoming cold damage and making it a helpful piece of gear during skilling events.Join thousands of satisfied players and choose RSgoldfast to get fast and reliable buy Runescape gold. Your journey to riches starts here!

        The Flame Cape is more than just a melee upgrade—it’s a symbol of triumph, a practical tool, and a stylish statement. Whether you’re after optimal melee stats, aiming for the Tzrek-Jad pet, or just want to show off your PvM skills, the Flame Cape is a must-have for any serious OSRS player.

      4. Mmoexp OSRS: Tithe Farm Guide

        Tithe Farm is a rewarding Farming minigame in Old School RuneScape. If you’ve ever done Farming before, you’ll understand that there’s a lot of waiting involved. You have to wait for your saplings, herbs, and seeds to bloom – there’s nothing to do meanwhile aside from other activities. Enough OSRS Gold may make you progress faster.

        Tithe Farm completely revitalizes and redefines Farming skills by providing an active training method. It’s the only way to effectively actively train Farming. Other activities, such as making Sulphurous fertilizer, are negligible, providing 2 Farming experiences for each item created. As such, Tithe Farm is the best way to actively train in Farming, alongside completing quests that reward Farming experience. At peak efficiency, you will receive around 100,000 Farming experience per hour. You can even play this minigame in between your tree & herb runs.

        Requirements

        The best way to reach this minigame is by using the minigame teleport system or Xeric’s Glade. Alternatively, use a Kourend teleport – a Portal Nexus will contain it. You can also relocate your house to the Hosidius house for about 9,000 gold, which is the staging city of the minigame.  If you’ve never been to Kourend before, you can speak to Veos at Port Sarim and explore the kingdom.

        Having your gear is always necessary. You’re going to need a Spade, something that’s stocked with pretty much every general store in the game. You will also need a seed dibber and multiple water cans: having eight water cans is what you’ll want.

        To participate in this minigame, you will need at least level 34 Farming and will be able to plant Golovanova seeds. However, being level 54 Farming and 74 Farming are successive progression steps that allow you to use Bolgano and Logavano seeds, respectively. To maximize the experience, being level 74 is ideal, but this is the only real active way to train in Farming, regardless.

        The Tithe Farm minigame is locked behind the requirement of having 100% Hosidius’ favor. Favor is a system that’s used exclusively within Great Kourend, and there are 5 houses. You can view your status by clicking the icon within the quest log.

        Have you gained favor in another house already? If you have, you must reach 100% favor starting to gain favor. You must start the Architectural Alliance mini-mini question in favor of House Architects (only available once you’re at 100% with that particular house). Without locking in favor to gain favor from other houses, you lose favor in any house you currently have standing in.

        If you have the Graceful outfit, it will greatly help maintain your energy in conjunction with stamina potions (or super energy potions). Additionally, if you’ve unlocked the Lunar spellbook by completing Dream Mentor, Humidify is a fantastic utility spell. Humidify will allow you to refill water cans without having to visit a water source in exchange for 1 astral rune, 1 fire rune, and 3 water runes. However, Full Graceful is far more helpful than Humidify. You will face energy issues throughout, so it’s worth bringing as many pieces of weight-reducing gear as you can.

        Walkthrough & Strategy  

        To begin with, you’ll be at the Farmers House, where the purple icon is located. Pick the highest level of available seeds from the table. You’ll get a set of 100 seeds: that’s the maximum you can carry. Proceeding with that, you can enter your instance of Tithe Farm. Be cautioned that as it is an instanced area, if you drop items and leave the instance, they are permanently lost.

        Immediately, you will be confronted with many patches. You can plant your seeds anywhere unless there’s a dead plant already there. After planting your seed, you will need to water it three times, each having its growth e. The total time for plant growth is around 3 minutes. If you do not water a plant before the end of its growth cycle, it will die, and you have wasted a seed.

        The best strategy for the minigame is to take advantage of 5 patches. By the time you’ve fully planted all 5, you can navigate back to the first plant and water it just in time.

        You will be given Gricoller’s fertilizer upon entering the minigame. However, using it will merely complicate matters and is not recommended for absolutely any purpose. If you attempt to grow seeds in more than 5 patches, you will be unable to manage growth cycles and will have dead plants.

        Once a plant has fully grown, you need to harvest it. If you delay the harvest process, the plant will also effectively die just as if you never watered it. You must then deposit any harvested fruit in the sack at the eastern side of Tithe Farm. For each fruit you deposit after the 74th, you will additionally gain one point you can spend within the rewards shop. If you leave the farm before depositing 74 fruits, as it is instanced, your counter will start again at 0. If you want any of the rewards, you must ensure that to plant 100 seeds for maximum efficiency.

        Rewards

        The main reward from this minigame is, of course, the Farming experience. At 34 Farming, you can expect roughly 30,000 XP/hr. At 54 Farming, you’re looking at around 60,000 experience per hour. At level 74 Farming, you will receive around 100,000 experience hourly. Your current Farming level doesn’t play any role, it’s about your speed with the minigame and the best seed you have access to.

        The best reward from the shop is the Farmer’s outfit. Wearing the full Farmer’s outfit will provide a 2.5% experience bonus for any Farming activity. Each piece itself will provide a marginal experience bonus. So, when you’re depositing fruit, switch from Graceful to the Farmer’s outfit, and you’ll gain additional experience. The bonus isn’t capped to just Tithe Farm, though; it’s anywhere throughout RuneScape. With that said, though, the Farmer’s outfit costs 400 points altogether, so it’s no easy feat to achieve!

        If you need OSRS gold and items, MMOexp can be a helpful time-saver – whether you need gear for the Tithe grind or want to optimize with the right runes and potions.

      5. Alternative P2P Mining Training (70-99): The Explosive Mine Minigame in OSRS

        Alternative P2P Mining Training (70-99): The Explosive Mine Minigame in OSRS

        Old School RuneScape offers a variety of training methods for Mining, and one of the most exciting and profitable ways to level up is through the Explosive Mine Minigame. Available from level 75 onward, this unique activity provides a dynamic alternative for players aiming to reach level 99 while also accumulating valuable resources.

        While it is possible to participate in Explosive Mining before level 75, doing so is not recommended. The probability of obtaining rune ore and other valuable minerals is significantly lower at earlier levels, which reduces both experience gains and profits. Once players reach level 75, their chances of obtaining high-tier ores increase, making this method far more worthwhile.Join thousands of satisfied players – get your OSRS gold now!

        Essential Gear and Items

        To participate in the Explosive Mine Minigame efficiently, players should come prepared with the following items:

        Explosives – These are fundamental to the minigame and must be stocked in advance.

        Chisel – Used to break down ores, maximizing the experience gained.

        Tinderbox – Required to ignite explosives, a key mechanic in the minigame.

        Recommended Equipment:

        Weight-Reducing Gear – Such as Graceful Outfit or Elegant Clothing to conserve run energy.

        Stamina Enhancements – A Stamina Ring and Stamina Potions help maintain energy levels for longer play sessions.

        Pickaxe (Optional) – Although not essential, a Dragon Pickaxe can boost mining efficiency. Its special attack provides a temporary Mining level increase, improving ore yield and experience rates.

        Prospector Kit – Grants additional experience when collecting ore from the Operator, making it an invaluable asset for long-term training.

        Strategies for Maximum Efficiency

        To get the best experience rates and profits from the Explosive Mine Minigame, consider the following strategies:

        1. Optimized Mining Routes

        Learn the layout of the mining area to reduce unnecessary movement. Establishing an efficient routine ensures minimal downtime and maximized mining output.

        1. Resource Management

        Always keep a sufficient supply of explosives, chisels, and tinderboxes. Running out of key resources can disrupt progress and lower overall efficiency.

        1. Teamwork for Efficiency

        Mining in a group can enhance both experience and profit rates. By sharing resources and working together, players can mine more efficiently and increase their earnings.

        1. Monitor Experience Gains

        Keep track of your XP rates. If you notice a decline, adjust your mining route, resource usage, or take short breaks to maintain high efficiency.

        Profitability and Rewards

        One of the most appealing aspects of the Explosive Mine Minigame is its profitability. As players advance, they can mine rune ore, a highly sought-after resource used for crafting and smithing. This ore is consistently in demand, making it a lucrative source of income.

        Beyond rune ore, players can also obtain various runes, further boosting profits. The combination of steady experience gains and valuable ores makes this method a compelling choice for miners seeking both skill progression and financial gain.

        The Explosive Mine Minigame is an engaging and profitable way to train Mining from levels 70 to 99 in OSRS. With the right gear, strategy, and efficient resource management, players can maximize both their experience rates and earnings. Whether you’re looking to reach level 99 or simply want an alternative to traditional mining methods, this minigame provides an exciting and rewarding path.

        Want to speed up your OSRS journey? Get instant cheap Runescape gold from RSgoldfast and unlock the best gear to dominate Gielinor today!