Blog

  • ARC Raiders Movie Night Mission Walkthrough

    ARC Raiders Movie Night Mission Walkthrough

    Movie Night is one of the narrative-driven quests introduced in the ARC Raiders:Headwinds update, adding a moment of calm and character-building amid the escalating ARC threat. Apollo’s idea is simple:host a movie night at Speranza to boost morale. The execution, however, sends players deep into dangerous territory to recover lost media relics from the old world.

    To complete the Movie Night quest in ARC Raiders, players must locate Old Movie Tapes and a Portable TV, then safely extract and return them to Apollo. This guide walks you through where to find both items, the safest routes to take, and how to maximize your chances of success.

    To obtain the Old Movie Tapes, players need to travel to the Cultural Archives area on the Stella Montis map. This location is found east of the Business Center and is known for both valuable loot and heavy enemy presence.

    Because this area can also spawn other useful ARC Raiders Items, many players combine this quest run with general farming or material collection.

    The Cultural Archives is a semi-enclosed urban zone filled with debris, crates, and abandoned storage areas. Unfortunately, it is also frequently infested with:

    Ticks, which can swarm and overwhelm careless players

    Shredders are capable of dealing heavy damage if engaged improperly

    Before entering the area, make sure your gear is repaired, and your inventory has enough space to secure the quest items.

    How to Search for Old Movie Tapes in the Cultural Archives

    Once inside the Cultural Archives, check your map and look for a blue cross icon inside a circle. This symbol marks the key search location for the Movie Night quest.

    Near this marker, you’ll find several boxes covered with a tarp. These containers stand out from the surrounding clutter and are the only valid spawn point for the Old Movie Tapes.

    Using your Safe Pocket is crucial, as it ensures the tapes won’t be lost if you’re forced into combat or fail to extract.

    How to Get a Portable TV in ARC Raiders (Movie Night Quest)

    After securing the Old Movie Tapes, the next objective is to find a Portable TV. Unlike the tapes, the Portable TV does not have a single guaranteed spawn location, making this part of the quest more RNG-dependent.

    Portable TV Locations in the Cultural Archives

    The Cultural Archives is still your best starting point. Portable TVs can spawn in several places here, including:

    Drawers and cabinets

    Breachable transport crates

    On top of objects, such as chairs, desks, or storage units

    Make sure to thoroughly search the area before extracting. Many players miss TVs simply because they don’t check elevated surfaces.

    Where Else to Find a Portable TV if You Get Unlucky

    If you fail to find a Portable TV in the Cultural Archives, don’t panic. You can safely extract back to Speranza and attempt another run.

    The Portable TV is categorized as a residential-type item, meaning it spawns more frequently in living spaces. Your best alternative farming location is Buried City.

    Best Buried City Locations for Portable TVs

    When searching Buried City, prioritize the following areas:

    Grandioso Apartments

    Santa Maria Homes

    Red Tower

    Space Travel buildings

    These locations contain multiple residential rooms, increasing the odds of finding a Portable TV in drawers, shelves, or on furniture. Buried City also tends to have predictable enemy patrols, making it safer for solo players.

    Extraction Tips for the Movie Night Quest

    Since both quest items are physical loot, successful extraction is mandatory. To improve your odds:

    Avoid extended fights once items are secured

    Use smoke grenades to disengage from hostile encounters

    Plan your extraction route before looting

    Prioritize stealth over combat

    If you’re struggling with repeated losses, upgrading gear-or even choosing to buy ARC Raiders Items to strengthen your loadout-can make future runs much smoother.

    Movie Night Quest Rewards in ARC Raiders

    After acquiring both the Old Movie Tapes and the Portable TV, return to Apollo in Speranza to complete the quest.

    Completing the Movie Night quest grants the following rewards:

    3× Showstopper Grenades

    3× Smoke Grenades

    1× Fireworks Box

    These rewards are especially useful for future raids, offering both offensive and defensive utility.

    Final Tips for Completing Movie Night Efficiently

    Always secure the Movie Tapes in your Safe Pocket

    Fully clear the Cultural Archives before leaving

    If the TV doesn’t spawn, switch to Buried City instead of repeating Stella Montis

    Residential zones dramatically increase TV spawn rates

    The Movie Night quest in ARC Raiders is a short but memorable objective that blends exploration, tension, and storytelling. With the right preparation and a careful search strategy, you can complete it in just one or two successful raids-and help Apollo bring a small moment of joy back to Speranza.
  • OSRS Osmumten’s Fang Guide: The Ultimate Weapon for High-Defense PvE

    OSRS Osmumten’s Fang Guide: The Ultimate Weapon for High-Defense PvE

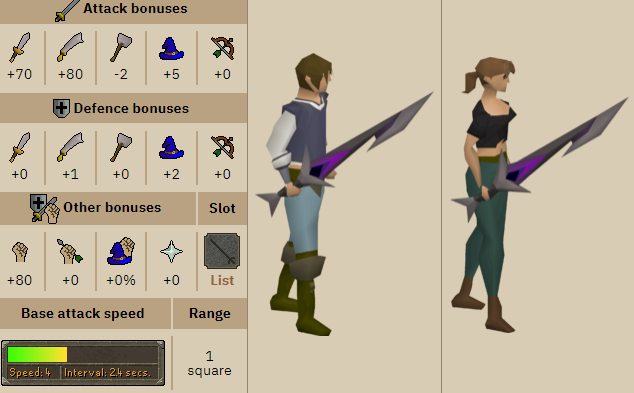
    In Old School RuneScape (OSRS), few weapons have reshaped high-level PvE combat as profoundly as Osmumten’s Fang. Introduced alongside the Tombs of Amascut raid, the Fang quickly gained a reputation for accuracy, reliability, and consistent damage against enemies with high defense. Unlike flashy weapons that focus on massive max hits, the Fang excels in sustained, dependable damage, making it an essential tool for endgame melee players.

    This comprehensive guide explores what makes Osmumten’s Fang stand out, its best use cases, and how to optimize your setup for maximum performance.

    What Is Osmumten’s Fang?

    Osmumten’s Fang is a one-handed stab melee weapon, primarily used with Strength-focused builds. It is specifically designed to shine against high-defense enemies, a niche where many other melee weapons struggle.

    What sets the Fang apart is its unique double-roll accuracy mechanic: instead of calculating a single accuracy roll for each attack, it rolls twice and chooses the better result. This significantly reduces zero-damage hits and smooths out overall damage output, making it far more consistent than other endgame weapons.

    Key characteristics of Osmumten’s Fang:

    ·One-handed melee weapon

    ·Stab attack style

    ·Double-roll accuracy mechanic

    ·Highly reliable DPS against high-defense targets

    Unlike weapons that rely on flashy max hits, the Fang emphasizes steady, predictable damage, which is often more valuable in long boss fights or raid scenarios.

    Why Osmumten’s Fang Excels in PvE

    The Fang’s unique design makes it especially useful in high-level PvE content. Its strengths include:

    1. Exceptional Accuracy

    The double-roll accuracy mechanic ensures the Fang lands hits more consistently than other weapons, even against bosses with extremely high Defense. Where other weapons frequently splash or hit zero, the Fang reliably contributes meaningful damage.

    2. Reliable DPS

    Over-extended fights, consistent hits often outperform weapons with higher theoretical max hits. Players who rely on sustained damage over time benefit significantly from Fang’s dependability.

    3. One-Handed Flexibility

    Being one-handed, the Fang allows the use of defenders or shields, which enhances both survivability and overall damage potential. This versatility is ideal in challenging raids or boss encounters.

    Best Use Cases for Osmumten’s Fang

    Osmumten’s Fang shines in scenarios where accuracy is more critical than raw max hit. Popular applications include:

    ·Tombs of Amascut raids

    ·God Wars Dungeon bosses

    ·High-defense Slayer bosses

    ·Group PvM situations where consistent damage is key

    While it can technically be used in PvP, the Fang is not designed for burst or surprise kills. Its strength lies firmly in PvE reliability, making it the weapon of choice for long fights against durable opponents.

    Gear and Requirements

    To maximize Osmumten’s Fang, players typically focus on:

    ·High Strength levels for increased damage

    ·Melee accuracy bonuses to leverage the Fang’s unique mechanics

    ·Gear that complements stab attack style

    Acquiring and building around the Fang can be expensive. Players often fund their progress through bossing, Slayer tasks, or Grand Exchange flipping. Others may responsibly choose to use OSRS gold, allowing them to focus on gameplay and progression rather than grinding for resources.

    How Osmumten’s Fang Changed Endgame Melee

    Before the Fang, high-defense PvE encounters often pushed players toward niche weapons or magic-based alternatives. Osmumten’s Fang offered a dependable melee option without relying on situational bonuses or gimmicks.

    Its consistency over raw power makes it particularly appealing for:

    ·Long boss fights

    ·High-stakes raid mechanics

    ·Players prioritizing predictable, steady damage output

    Even though it may not replace every weapon in your bank, it fills a critical niche that few other items cover as effectively.

    Conclusion: Why Osmumten’s Fang Is Essential

    Osmumten’s Fang is one of OSRS’s most intelligently designed weapons. Its double-roll accuracy, consistent damage, and one-handed versatility make it a must-have for endgame PvE combat.

    Whether you’re progressing through Tombs of Amascut, optimizing boss kill efficiency, or preparing your bank for long-term upgrades, understanding and utilizing the Fang is essential for success.

    For players looking to accelerate their progression, responsibly choosing to buy OSRS gold from reputable platforms can bridge the gap between time investment and high-end gear acquisition, allowing you to focus on combat mastery instead of grinding endlessly.

    In a game where consistency often defines success, Osmumten’s Fang stands out as one of the most reliable and powerful melee weapons in OSRS.

  • Top Augments to Boost Ammo Mods in Call of Duty:Black Ops 7

    Top Augments to Boost Ammo Mods in Call of Duty:Black Ops 7

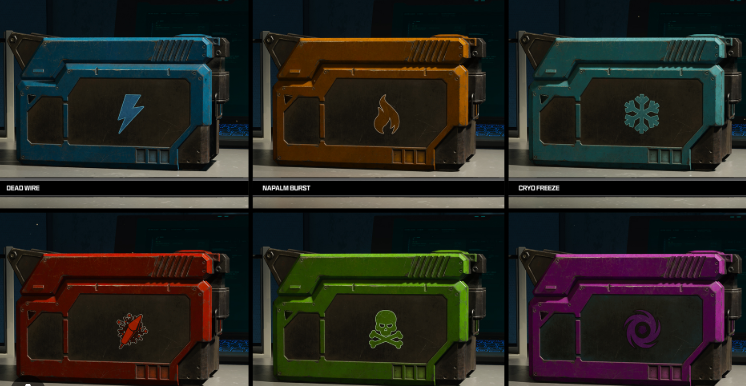
    Black Ops 7 Zombies launches with six powerful Ammo Mods, each offering unique elemental effects that can dramatically improve your damage output in high-round play and against dangerous Special and Elite enemies. But your Ammo Mod isn’t at full strength until you equip the right Major and Minor Augments through your Augment Research.

    Best Augments for Dead Wire in Black Ops 7 Zombies

    Recommended Major Augment:Ball Lightning

    Effect:Activating Dead Wire launches an orb that travels and deals electric damage to nearby enemies.

    Recommended Minor Augment:High Voltage

    Effect:Increases Dead Wire’s damage output.

    Why This Combo Works:

    Dead Wire is one of the strongest control-and-damage hybrids in the game, capable of stunning enemies and chaining electric damage through large groups. With Ball Lightning, you gain a roaming electric orb that acts as a temporary ally, shredding zombies automatically as it floats along your path. This synergizes perfectly with high-density rounds.

    Tips:High Voltage adds excellent value without disrupting your flow-perfect for players learning spawns or experimenting inside Call of Duty Black Ops 7 Bot Lobbies before jumping into harder matches.Whether you’re new to Black Ops 7 or pushing advanced techniques, MMOexp Black Ops 7 Bot Lobbies provide a stress-free environment to learn, practice, and improve at your own pace.

    Best Augments for Cryo Freeze in Black Ops 7 Zombies

    Recommended Major Augment:Ice Cloud

    Effect:Frozen enemies that die may leave a slowing ice cloud (with a cooldown to prevent over-spawning).

    Recommended Minor Augment:Liquid Nitrogen

    Effect:Greatly increases the chance for Cryo Freeze to activate.

    Cryo Freeze is one of the most reliable defensive Ammo Mods in Black Ops 7 Zombies. Slowing and freezing enemies gives you more control over large waves and lets you reposition safely. Although Ice Cloud was nerfed, its slowing field still helps massively during high-round chaos by reducing incoming swarm speed.

    Tips:Pairing it with Liquid Nitrogen means Cryo Freeze triggers more often.

    Best Augments for Fireworks in Black Ops 7 Zombies

    Recommended Major Augment:Starburst

    Effect:Fireworks explode instantly, firing flares in all directions.

    Recommended Minor Augment:High Yield

    Effect:Increases the explosion’s area of effect.

    With Starburst, that explosion happens immediately, saving crucial time and wiping threats before they get too close. High Yield increases the AoE radius, allowing the fiery lightshow to hit more zombies with each activation. Fire Works is already extremely strong, so nearly any Minor Augment works-but High Yield gives the most consistent map-wide value.

    Best Augments for Napalm Burst in Black Ops 7 Zombies

    Recommended Major Augment:Big Game

    Effect:Napalm Burst can now burn Elite enemies.

    Recommended Minor Augment:Contact Burn

    Effect:Increases the initial burn damage applied on hit.

    Napalm Burst specializes in burning zombies, leaving them smoldering long after you’ve shot them. Its damage-over-time effect is especially effective against Zursa zombie bears, which are weak to fire damage. Using Big Game lets your burn effect apply to Elite enemies-perfect for taking down high-health targets.

    Tips:Combine this with Contact Burn to front-load more damage immediately and punish Elite threats faster before they can close the distance.

    Best Augments for Shadow Rift in Black Ops 7 Zombies

    Recommended Major Augment:Gravity Well

    Effect:Shadow Rift becomes a black hole, pulling enemies in before teleporting survivors away.

    Recommended Minor Augment:Ammo Theorem

    Effect:Teleported enemies refund ammo directly into your magazine.

    Shadow Rift is an entertaining and powerful mod that can warp enemies into a gravity vortex, drop them from lethal heights, and scatter packs apart. Adding the Athe mmo Theorem turns Shadow Rift into a damage-plus-ammo engine. Every time zombies are teleported, you gain free ammunition, reducing reload downtime and ensuring constant firepower during intense rounds.

    Best Augments for Brain Rot in Black Ops 7 Zombies

    Recommended Major Augment:Pheromone

    Effect:Charmed enemies distract nearby Normal and Special zombies.

    Recommended Minor Augment:Extension

    Effect:Increases Brain Rot’s duration.

    Brain Rot is a fantastic utility Ammo Mod that temporarily converts zombies into allies who will fight on your behalf.

    Tips:We recommend the Extension for the Minor Augment because more uptime means more crowd control. A longer-lasting charmed zombie equals more tanking, more distraction, and more free kills while you focus on the priority targets.

    Choosing the best Augments for Black Ops 7 Zombies can dramatically enhance your Ammo Mod effectiveness. And if you want to refine your strategies, test new Augment setups, or practice your routes without pressure, many players choose to buy CoD Black Ops 7 Bot Lobbies to optimize their gameplay before diving into the highest rounds.Get ahead before it counts. MMOexp cheap CoD BO7 Bot Lobbies help you build consistency, confidence, and skill—so you’re ready when the real matches begin.

  • Diablo 4 Season 11 Barbarian Guide: How to Level Quickly and Efficiently

    Diablo 4 Season 11 Barbarian Guide: How to Level Quickly and Efficiently

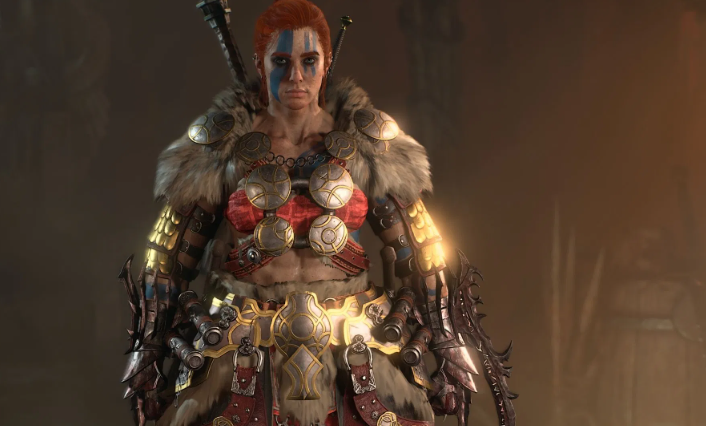
    Barbarians in Diablo 4 Season 11 remain one of the most versatile and fast-paced classes for leveling. Among the various builds, the Whirlwind Barbarian continues to shine as the fastest, most comfortable, and consistent path to level 60. This guide breaks down everything you need: the core mechanics of the build, skill priorities, passives, Mercenary and Rune combos, Divine Gifts, and the best gear choices to transition smoothly into Season 11 endgame content.

    How the Whirlwind Barbarian Leveling Build Works

    The Whirlwind Barbarian relies on a simple yet highly effective loop:

    1. Generate Fury using Lunging Strike

    2. Activate Shouts for Fury, movement speed, and survivability

    3. Pull enemies together with Wrath of the Berserker + Ground Stomp

    4. Spin through mobs with Whirlwind, applying damage over time and Bleed effects

    The build’s power comes primarily from Dust Devils, small whirlwinds spawned by Whirlwind and Shouts. These deal supplemental damage and dramatically increase AoE clear speed. Defensive layers are maintained through key Legendary Aspects, including:

    ·Aspect of Might – Increases Armor and Damage Reduction

    ·Aspect of Disobedience – Boosts Fury generation and mitigates incoming damage

    ·Aspect of Numbing Wrath – Adds defensive utility and sustain

    Consistently using Lunging Strike every few seconds refreshes these defenses, and combined with Rallying Cry, Barbarians remain tanky enough to face most leveling encounters.

    Skill Bar Setup

    For fast and efficient leveling, the recommended active skills are:

    ·Lunging Strike – Primary Fury generator and mobility tool

    ·Whirlwind – Main damage dealer and AoE skill

    ·Wrath of the Berserker – Buffs damage and movement speed

    ·War Cry – Increases Fury and defensive stats

    ·Ground Stomp – Crowd control and positioning

    ·Rallying Cry – Sustain through healing and defensive bonuses

    This combination ensures smooth gameplay by balancing mobility, resource management, crowd control, and consistent damage output.

    Talent and Arsenal Choices for Leveling

    The Barbarian Talent Tree should prioritize:

    1. Unlocking Whirlwind and upgrading it first

    2. Grabbing core Shout passives for Fury generation

    3. Investing in Fury generation and defensive nodes

    4. Adding Bleed multipliers to Whirlwind for sustained damage

    5. Unlocking mobility and Berserking nodes for faster floor clearing

    Arsenal’s setup allows Barbarians to assign weapon types to specific skills. For this build:

    ·Technique Slot: Two-Handed Axe for extra damage to Vulnerable enemies

    ·Whirlwind & Lunging Strike: Two-Handed Slashing Weapon

    This ensures that Furious Whirlwind applies Bleed, drastically boosting AoE damage during leveling.

    Divine Gifts for Barbarian Leveling

    In Season 11, Divine Gifts are essential for maximizing XP and resource efficiency. The best leveling option is Essence of Squalor, obtained from Helltides.

    Why Essence of Squalor excels:

    ·Maggots drop Experience Globes

    ·Effects are doubled when Purified

    ·Grants a free healing potion every 20 seconds

    This Gift turns Helltides into XP farms, letting players reach level 60 quickly. For optimal efficiency, keep a stock of Diablo 4 materials to craft upgrades between Helltides.

    Best Mercenary and Rune Combos

    Mercenaries provide crucial crowd control and support during leveling. Raheir remains the top choice for Whirlwind Barbarians due to his CC abilities and defensive toolkit.

    Raheir Talents:

    ·Ground Slam

    ·Raheir’s Aegis

    ·Bastion

    ·Inspiration

    Secondary Mercenary: Varyana – links Bloodthirst to Whirlwind for extra sustain and burst.

    Recommended Rune Combinations:

    1. Cir + Gar: After three casts of a non-channeled skill, gain Crit Chance

    2. Moni + Tec: Using two Mobility or Macabre skills triggers a mini-Earthquake

    These combinations enhance damage, sustain, and combat engagement before full Whirlwind synergies kick in.

    Uniques and Aspects for Endgame Transition

    While leveling is forgiving with gear, preparing for endgame ensures smooth progression. Barbarians benefit from upgrading or buying Diablo IV Items to jumpstart their Season 11 endgame journey.

    Top Endgame Uniques:

    ·Melted Heart of Selig

    ·Ramaladni’s Magnum Opus

    Key Legendary Aspects for Whirlwind:

    ·Dust Devil’s Aspect – Boosts AoE and sustain

    ·Aspect of Numbing Wrath – Defensive enhancement

    ·Aspect of Disobedience – Fury and damage synergy

    ·Aspect of Might – Armor and DR

    ·Aspect of Limitless Rage – Increases Fury and burst

    ·Aspect of Echoing Fury – Enhances Whirlwind hits

    ·Veteran Brawler’s Aspect – Reduces incoming damage and enhances survivability

    These elements collectively improve survivability, maximize AoE damage, and allow easy transition to greater difficulties.

    Final Thoughts

    The Whirlwind Barbarian is currently the fastest, most reliable way to level from 1-60 in Diablo 4 Season 11. It offers:

    ·High AoE damage for rapid mob clearing

    ·Strong survivability through Aspects and Shouts

    ·Straightforward skill rotation for low-maintenance play

    ·Seamless transition into endgame content

    Even if your ultimate goal is a HOTA build or another endgame specialization, Whirlwind provides the speed, efficiency, and comfort needed to dominate the leveling process in Season 11. For players looking to optimize XP, loot, and skill progression, this build remains the go-to Barbarian path.

  • How to Get the Crown of Lucion in Diablo 4

    How to Get the Crown of Lucion in Diablo 4

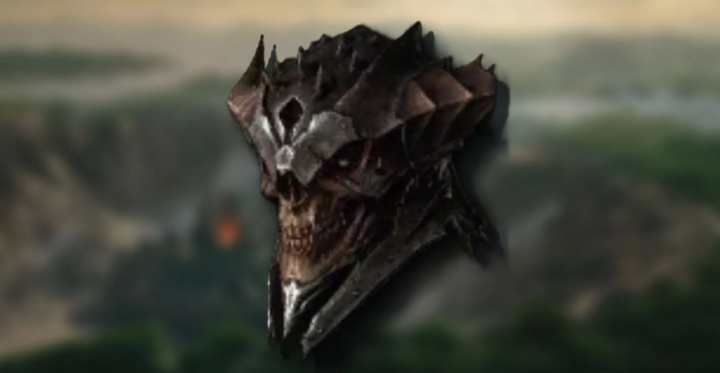
    In Diablo 4, obtaining powerful gear is key to progressing through the game’s difficult endgame content. One such coveted item is the Crown of Lucion, a unique helm that offers substantial bonuses and buffs, making it highly sought after by players looking to optimize their builds. If you’re wondering how to get the Crown of Lucion, you’re not alone. The item is tied to a specific in-game event and requires careful navigation of the game’s mechanics. This article will walk you through how to obtain this powerful item, from understanding its significance to the steps you need to take in order to secure it for your character.

    What is the Crown of Lucion?

    Before diving into the methods for obtaining the Crown of Lucion, it’s important to understand why this item is so desirable. The Crown of Lucion is a unique Diablo 4 Items, meaning it is not just a regular piece of equipment you can buy or loot easily. It has a distinct appearance and offers significant boosts to your character’s stats, particularly in the form of increased resistances, damage output, and resource generation. This makes it an invaluable piece for players looking to tackle endgame content, where survivability and power are essential.

    It’s particularly popular among players who prefer to focus on Survivability and Sustainability. The helm’s bonuses are especially useful for players who enjoy challenging encounters, such as World Bosses, Nightmare Dungeons, and PvP, where every bit of added strength counts.

    Step 1: Understand the Requirements

    To acquire the Crown of Lucion, you must first understand the requirements. It is not something you can buy from a vendor or pick up as part of a quest reward. Instead, the item is part of a rare drop that occurs in specific areas of the game. Here’s what you need to know:

    Level Requirements: Typically, the Crown of Lucion requires you to be at a higher level, likely level 70 or above, since it is geared towards endgame players. As such, you’ll need to complete the main story and progress through various zones to unlock access to the endgame content where the item drops.

    Unique Item Status: The Crown of Lucion is a Unique Item, meaning it cannot be traded or sold. You will have to acquire it through direct interaction with the game’s mechanics.

    Special Event or Location: The item’s drop is linked to a special event or specific locations where it is more likely to be found. Knowing where and when to look is key to securing it.

    Step 2: Participate in Special Events

    One of the main methods for obtaining the Crown of Lucion is by participating in seasonal events or limited-time challenges. Diablo 4 frequently introduces seasonal content where certain items, such as the Crown of Lucion, are more likely to drop. These events often come with unique challenges and conditions, making them more rewarding.

    Seasonal Events: Be on the lookout for seasonal events that focus on a specific theme, such as demonic invasions, artifact hunting, or world boss raids. These events increase the likelihood of encountering high-tier loot, including rare and unique items like the Crown of Lucion. Completing these challenges can also reward you with Lucion’s Favor, a currency that can be spent to either unlock the item directly or boost its chances of dropping.

    World Bosses: The Crown of Lucion has a chance of dropping from World Bosses that spawn at random intervals. These bosses are high-level enemies that require large groups of players to defeat, making them a challenging and rewarding experience. Participating in World Boss events during a season where the Crown of Lucion is a possible drop can significantly increase your chances.

    Step 3: Farm Lucion’s Legacy Dungeons

    Another way to obtain the Crown of Lucion is by farming Lucion’s Legacy Dungeons. These special dungeons are designed to challenge even the most seasoned adventurers. They are scattered across Sanctuary and can be accessed through certain areas once you reach the required level. These dungeons are not just difficult-they are highly rewarding. Completing them increases the drop rate of unique items, and the Crown of Lucion is among the possible rewards.

    Here’s how you can approach farming these dungeons:

    Find Lucion’s Legacy Dungeon Locations: These dungeons can be found in specific areas of Sanctuary. The exact locations may change with each season or update, so check community guides or online forums for the latest information on where these dungeons are spawning.

    Prepare for a Challenge: Lucion’s Legacy Dungeons feature powerful enemies and require a well-equipped character to survive. Be sure to level up your character and have the proper gear before venturing in. Bring friends or party up with other players to increase your chances of success.

    Complete the Dungeon: Once inside, your goal is to defeat the dungeon’s end boss and collect any loot that drops. There is a chance that the Crown of Lucion will appear as part of your rewards, though it may take multiple runs before you get lucky.

    Step 4: Use the Lucion’s Favor Currency

    As mentioned earlier, Lucion’s Favor is a special currency that can be earned by participating in specific events or completing certain challenges. This currency can be used to increase your chances of obtaining the Crown of Lucion. Here’s how it works:

    Earn Lucion’s Favor: You can earn Lucion’s Favor by completing objectives, defeating world bosses, or engaging in special events where the Crown of Lucion is a potential drop. The more you participate, the more Lucion’s Favor you’ll accumulate.

    Spend Lucion’s Favor for Higher Drop Rates: Once you’ve gathered enough Lucion’s Favor, you can spend it at special NPC vendors located in major cities. These vendors offer buffs that increase the drop rates of unique items, including the Crown of Lucion. Some events may allow you to directly purchase the helm with Lucion’s Favor, eliminating the randomness of drops.

    Step 5: Trade with Other Players (Limited)

    While the Crown of Lucion cannot be directly traded, player-to-player interactions may still play a role in acquiring the item. If a friend or guildmate obtains the helm, it is possible that they can offer you help in farming or share strategies on where to find it. This kind of support can greatly speed up your progress toward obtaining the helm.

    Conclusion

    Acquiring the Crown of Lucion in Diablo 4 is no easy feat, but it’s well worth the effort for players seeking to enhance their builds and face endgame content head-on. Whether you’re participating in seasonal events, farming Lucion’s Legacy Dungeons, or utilizing Lucion’s Favor, the journey to acquiring this powerful helm will require both patience and strategy. Stay engaged in the game’s community and keep an eye on in-game events for the best opportunities to score this prized item. Of course. You can choose to buy cheap D4 Gold to help you become stronger and obtain this item faster. With a little luck and persistence, the Crown of Lucion could soon be yours, bolstering your character’s power for the challenges ahead.

  • Call of Duty: Black Ops 7 Zombies – Complete Ammo Mods Guide

    Call of Duty: Black Ops 7 Zombies – Complete Ammo Mods Guide

    In Call of Duty: Black Ops 7 Zombies, weapon mastery goes beyond simple Pack-a-Punch upgrades. The real key to high-round survival lies in Ammo Mods, elemental enhancements that transform ordinary bullets into deadly status-inflicting projectiles. These upgrades can ignite, freeze, electrocute, poison, or even warp enemies, adding tactical versatility to every gunfight.

    This SEO-ready breakdown covers every Ammo Mod in Black Ops 7 Zombies, including all Major and Minor Augments, their effects, and how to unlock them. Whether you’re grinding solo or teaming up in co-op, mastering these systems will elevate your gameplay-and with Call of Duty Black Ops 7 Bot Lobbies, you can safely practice activation timing and combo setups without risking your streak.

    What Are Ammo Mods in Black Ops 7 Zombies?

    Ammo Mods are elemental weapon attachments that grant your bullets powerful secondary effects. Once equipped, they trigger during combat when shooting enemies, unleashing fire, frost, electricity, or shadow energy depending on your chosen mod. These elemental effects don’t just increase damage-they can slow, stun, or even turn zombies against one another.

    Players can install or upgrade Ammo Mods at the Arsenal Machine, located in locked buildings across the map. These can be accessed by spending Salvage, a crafting resource earned from zombie kills or looted containers. Once unlocked, you can swap Ammo Mods freely as long as your character meets the required level and resource costs.

    After unlocking several mods, it’s a good idea to test them in Call of Duty Black Ops 7 Bot Lobbies, where you can simulate real combat conditions, experiment with builds, and find the perfect augment combinations for your loadouts before jumping into ranked or survival modes.

    All Ammo Mods in BO7 Zombies

    Below is a full list of all six Ammo Mods currently available in Call of Duty: Black Ops 7 Zombies, complete with their effects and all Major and Minor Augments.

    1. Fire Works (Fire Damage)

    Effect: Launches an explosive firework on impact, dealing area-of-effect fire damage and setting enemies ablaze.

    Major Augments:

    ·Big Game: Can activate on elite enemies, creating a larger explosion.

    ·Starburst: Fireworks detonate instantly, releasing burning flares in all directions.

    ·Weeping Willow: Flares linger briefly before exploding again.

    ·Fire Wheel: Spawns spinning wheels of fire that continuously burn enemies.

    Minor Augments:

    ·Starlight: Launches additional flares per activation.

    ·Big Bang: Boosts damage against special and elite enemies.

    ·High Yield: Expands explosion radius.

    ·Short Fuse: Reduces cooldown time between activations.

    Tip: Fire Works excels in crowded hallways and defensive holds, especially when paired with automatic rifles or LMGs.

    2. Brain Rot (Toxic Damage)

    Effect: Infects and charms enemies, causing them to fight for you while spreading toxic gas to others nearby.

    Major Augments:

    ·Plague: Turns an enemy against others for a short period.

    ·Pheromone: Charms one zombie that distracts nearby undead.

    ·Big Game: Increases charm frequency on elite enemies.

    ·Caustic Fumes: Adds toxic splash damage to charmed enemies’ attacks.

    Minor Augments:

    ·Extension: Increases charm duration.

    ·Haste: Reduces cooldown.

    ·Explosive: Causes charmed zombies to explode in toxic damage when the effect ends.

    ·Super Serum: Boosts the damage output of the charmed target.

    Tip: Brain Rot is perfect for solo players or defensive setups, providing breathing room and passive crowd control during heavy rounds.

    3. Cryo Freeze (Frost Damage)

    Effect: Freezes or slows enemies, making them easy targets for follow-up shots or melee finishers.

    Major Augments:

    ·Big Game: Increases slow effect chance on elites.

    ·Ice Cloud: Frozen enemies leave behind frost clouds that slow nearby zombies.

    ·Frozen Stiff: Fully freezes enemies in place.

    ·Cold Company: Affects multiple enemies within range simultaneously.

    Minor Augments:

    ·Extension: Increases freeze duration.

    ·Freezer Burn: Adds extra frost damage over time.

    ·Liquid Nitrogen: Increases activation chance.

    ·Thermal Shock: Causes thawing enemies to take bonus damage.

    Tip: Cryo Freeze is a supportive Ammo Mod, perfect for precision shooters or crowd control builds that rely on setting up combo kills.

    4. Dead Wire (Electric Damage)

    Effect: Sends arcs of lightning through zombies, stunning groups and chaining damage between them.

    Major Augments:

    ·Chain Lightning: Spreads electric damage to nearby targets.

    ·Big Game: Stuns elite enemies more effectively.

    ·Lightning Strike: Calls down a powerful lightning bolt, stunning nearby enemies.

    ·Ball Lightning: Fires a charged orb that zaps zombies within range.

    Minor Augments:

    ·High Voltage: Boosts overall electric damage.

    ·Haste: Reduces activation cooldown.

    ·Extension: Increases stun duration.

    ·Aftershock: Causes stunned zombies to spread the shock to others.

    Tip: Dead Wire is ideal for team synergy, as its stuns can save downed allies or interrupt heavy enemy waves.

    5. Napalm Burst (Fire Damage)

    Effect: Ignites zombies on impact, dealing burning damage over time and causing fiery chain explosions.

    Major Augments:

    ·Big Game: Triggers more burn effects on elites.

    ·Thermite: Enhances burn power and duration.

    ·Firebomb: Burned zombies explode on death, spreading flames.

    ·Petroleum: Creates persistent fire pools that damage zombies who walk through them.

    Minor Augments:

    ·Extension: Extends burn duration.

    ·Incendiary: Increases chance to spread flames.

    ·Contact Burn: Boosts overall fire damage.

    ·Backdraft: Expands burn radius and activation chance.

    Tip: Napalm Burst thrives in tight spaces or when defending objectives, letting the chain fire wipe out clustered undead.

    6. Shadow Rift (Shadow Damage)

    Effect: Warps enemies through dark portals, causing gravitational pulls and explosive shadow damage.

    Major Augments:

    ·Big Game: Activates more often on elite targets.

    ·Topple Danger: Slams warped enemies into others, causing chain damage.

    ·Explosive Rain: Drops warped zombies from above for impact explosions.

    ·Gravity Well: Creates a mini black hole that sucks in and teleports enemies.

    Minor Augments:

    ·Haste: Reduces cooldown.

    ·Targeted: Makes warped enemies fall on others for bonus impact damage.

    ·Ammo Theorem: Restores ammo when enemies are teleported.

    ·Supermassive: Expands explosion radius and increases damage.

    Tip: Shadow Rift is a late-game powerhouse, capable of clearing massive waves or disorienting elite bosses.

    Final Thoughts

    Ammo Mods are essential for survival in Call of Duty: Black Ops 7 Zombies. Whether you’re freezing entire hordes or creating chain fire explosions, these upgrades turn any weapon into an elemental powerhouse.

    Once you’ve unlocked your favorite combination, hop into Call of Duty Black Ops 7 Bot Lobbies to refine your timing, level up weapons faster, and experiment with new mod synergies. For players who want full control over their Zombies experience, buy CoD Black Ops 7 Bot Lobbies to safely test loadouts, optimize builds, and perfect every elemental effect before facing the undead horde.

    With the right Ammo Mod setup, every trigger pull becomes a devastating elemental strike-turning you into an unstoppable force in Black Ops 7 Zombies.